Showing posts with label Easter. Show all posts

Wednesday, March 25, 2015

Chicky Foot Print Craft

This is similar to my last post, but very different because although we're using the same type of toy for this Easter painting activity, we're using it in a much different way. We didn't wind this one up and let it go to make a trail like we did with the bunny. We just dipped it's feet in paint and made prints with it the way you would anything else. They turned out adorable!


All you need for this is a wind up toy chick (they sell them at Target, and probably Dollar Tree, as well as other places I'm sure), a paper plate, orange tempera paint, and some white paper.

 You just put some paint on the plate so that your little one will be able to dip the chicks feet in and make their prints.

Hilarious Hopping Bunny Trail Painting

Have you ever gotten on of those bunnies that they sell around Easter time that you can wind up and they hop all over the place? They are too great to pass up. They always make my little one laugh so hard, and she laughed even more when it was leaving a bunny trail during this paint activity.

All you need for this activity is one of the hopping bunnies (they can be found at Target, and I think the Dollar Store, and probably a variety of other places as well), a paper plate, some white paper, and any color you'd like of washable tempera paint. My daughter chose pink for ours.

All you do is lay out the white paper on the table or whatever hard, flat surface you have for your bunny to hop on. Then you squirt some of the paint onto the paper plate in a little puddle that you can dip the bunnies feet into. Once you've done that you wind it up and set it on the paper. It will start hopping all over leaving a trail of paint behind it!


My daughter just loved this activity. I bet your kids would too! It's the perfect fun time Easter craft!

Tuesday, March 24, 2015

Invitation to Create Bunnies

This idea popped into my head one day, with Easter coming up, and I was amazed at how good the set up turned out. I love invitations to create and always love setting up a great one for my daughter. This one was absolutely perfect. I hope you and your kids will have fun with it too!


So, the idea was to set out some bunnies and books about bunnies that had pictures of them. These things serve as the inspiration for the child to make their own bunny or bunnies. I put out our Thumper stuffed animal, a Little People bunny and carrots, a carrot Easter egg, and some bunny books. There was also a Thumper Easter book laying nearby that by daughter ended up choosing to model her bunnies after in the following picture.

So, after I figured out what the inspiration was going to be, I needed to decide what art supplies to put out to give her enough options to get creative with the making of her bunnies, but to also keep with the realistic bunny theme.

I decided on three sheets of construction paper, one in white, one in orange, and one in green. I would have laid out a gray one too if I had one. I picked these colors because I was picturing bunnies on the white that she could color with the crayons, green for maybe some grass, orange for a carrot if she wanted.

I laid out 6 crayons (black, gray, orange, white, green, brown). I chose these for the colors of bunnies, grass, carrots, drawing a face or other details). I'll say now that I ended up needing to get a yellow sheet of construction paper and a pink crayon for my daughter as well for her background, and for the inside of the bunnies ears, per her request. I totally allowed that, as this activity is also very free flow.

I also had out scissors, a small bowl of googly eyes in various sizes, a bowl of cotton balls (think bunny tails), and a bottle of glue. We also needed to grab some qtips to use with the glue, because that's how we like to do it sometimes.

This was her selecting her bunny (Thumper) in the book. It was her idea to also wear the bunny ears during this activity, such a cute addition!


First she took the white piece of paper and the gray crayon and drew the outline of her bunny. I was amazed by it! She cut it out a little bit and then asked me to do the rest because she didn't want it to loose the shape she had designed. I gladly helped, and then she used the crayons to color the bunny the way she wanted to, trying to model it off of Thumper.

Once she was finished coloring the bunny and his ears, we used the green construction paper to make grass for her yellow background. I held the paper for her while she cut little lines on the paper to make it look like grass. Then she glued that on to the paper, then she glued her bunny on to the paper and glued his tail on as well.

She then decided to take the brown crayon and just draw another bunny right on the paper next to her Thumper, she was drawing his sister Daisy. Then I put the carrot inspirations out for her to look at while she drew carrots for the bunnies to have.


Then we made the decision to add the googly eyes to the bunnies because they looked a little funny without them. 
This was the finished product of my daughter's Invitation to Create Bunnies. Beautiful! 

Your little one will have so much fun doing an invitation to create based on bunnies like this! You can put out whatever bunny things you like, including Easter bunny stuffed animals, any books with bunnies in them. You can put out any supplies you like, if you're modeling yours off your Easter bunny collection maybe you'll need pinks and other pastel colors. Just make sure you keep it free flow for your kid to create, and try to let go of trying to control the process. 

Wednesday, February 25, 2015

The Perfect Little Things for an Easter Basket

I love giving things in the Easter basket that are needed anyways and so I'm putting together a helpful list of little things to add into an Easter basket that are very useful and help fill up the space between the bigger items.


1. Crayons are always appreciated. This year my daughter is getting a pack of glitter crayons.

2. A new pack of undies with a favorite character on them!

3. New spring shoes!

4. Socks. My favorite's can be found here 

5. Jewelry! Can also fit in Easter eggs.

6. Any Annie's bunny snacks are perfect anytime of the year, but especially at Easter time! There's a selection of all kinds here 

7. Glitter glue

8. Stickers, stickers, and more stickers! Joann Fabric's has lots of cute packs.

9. Highlighters. My daughter loves to use pink highlighters to do her tracing worksheets because she can see it so much better over lines than anything else.

10. Books. Toys R Us has lots of Easter books, but I like to give the Easter books before Easter so they can be enjoyed leading up to the holiday. Board books for babies/toddleres or Golden books for preschoolers are good choices.

11. Hair accessories, hats, infinity scarves. Justice has super cute scarves for girls, and Gap has cute hats for boys!

12. Chalk. Dollar Tree normally has some chalk in cute Easter shapes around Easter, here they are!

13. A game or gift card for to buy apps for their Leappad or LeapTV.

14. A barbie doll or action figures.

15. Wheelie cars or Hotwheels.

16. Bubbles.

17. A CD.

18. A movie.

19. A new toothbrush. Pillow Pets make cute ones now!

20. A cute toothbrush holder.

21. New sunglasses, Children's Place usually has great ones!

22. Chocolate bunny.

23. Other candy, Reese's eggs/jelly beans, whatever you like to give your kids.

24. Organic lollipops.

25. A watch

26. Homemade play dough. You can make it look like a carrot like this 

27. Light jacket for Spring.

28. Bubble bath.

29. Pajamas.

30. Little People. They now sell Little People with all different jobs for just $2.99 each.

31. Bath toys

32. Cups

33, Utensils

34. Balls. All different kinds for all different ages, I love these for babies 

35. Animal Planet Tubes.

Wednesday, April 16, 2014

Easter Sensory Bin

We're definitely gearing up for the Easter holiday here! Here's our Easter Sensory Bin for this year.
The base material was some blue Easter grass and some green Easter grass. I really like the new Easter grasses they have out this year, they're like a cross between paper shred and foil shred. Really great, new sensory experience for kiddos.

Then I added some really simple things. Though it was simple my daughter (at 2 years old) still really enjoyed it. I added a stuffed animal bunny, some plastic eggs in different designs, and a windup chick.

"Jesus Loves Me" Easter Squish Bag

First in this post I just want to say that we are not a family that is religious connecting with Catholic or Christian religions. However, I'm going to educate my daughter on all religions and let her choose the one she connects closest with. So, as a part of educating her on all holidays, I do tell her what Easter and certain other holidays are "really" all about. She thinks all the crosses and Jesus stuff is adorable and it's very innocent letting her play with this squish bag and talking about the "real" meaning of Easter originally. Whether your family is religious or not, if you're homeschooling, it's still important to discuss all of this at some point, especially since it is what a lot of people believe in. We'll discuss in way more depth once she's middle school to high school aged. Anyway! Here's the "Jesus Loves Me" Easter Squish Bag that I made for her!
It is super cute!

To make a squish bag like this for your little one you'll need:
- A Ziploc bag (I used sandwich sized)
- Craft foam "Jesus Loves Me" hearts and crosses. You may be able to find the sticker kind, or the kind that's just foam at your craft store. Either one works fine, we used some of both in ours.
- Clear hair gel (can be purchased at Dollar Tree)
- Yellow food coloring
- Masking tape

Step 1:
Squirt enough clear hair gel into the Ziploc bag. It's really your call, you'll have to feel around with it. There's no exact measurement. Once you've got enough add in some drops of the yellow food coloring and mix that around with your fingers. Be careful, too much yellow food coloring turns to orange very, very quickly!

Note: during this step don't get the part where it zips shut wet with hair gel or you'll have a harder time sealing it up when finished. You can zip it shut when mixing and be careful to not squish the gel up to the very top during.

Step 2:
Open the bag and add in the "Jesus Loves Me" hearts and the crosses. You can stick them in to the hair gel a bit, or just lay them in there. Then zip the bag shut and move them around a bit.

Step 3:
Put some masking tape around the top and bottom of the bag so it can't be opened or get a hole on one of the bottom corners.

Step 4:
Give it to your little one! Show them how to squish it and move the objects around with their fingers. This will hone their fine motor skills.

Sunday, April 13, 2014

Homemade Pastel Paints for Easter

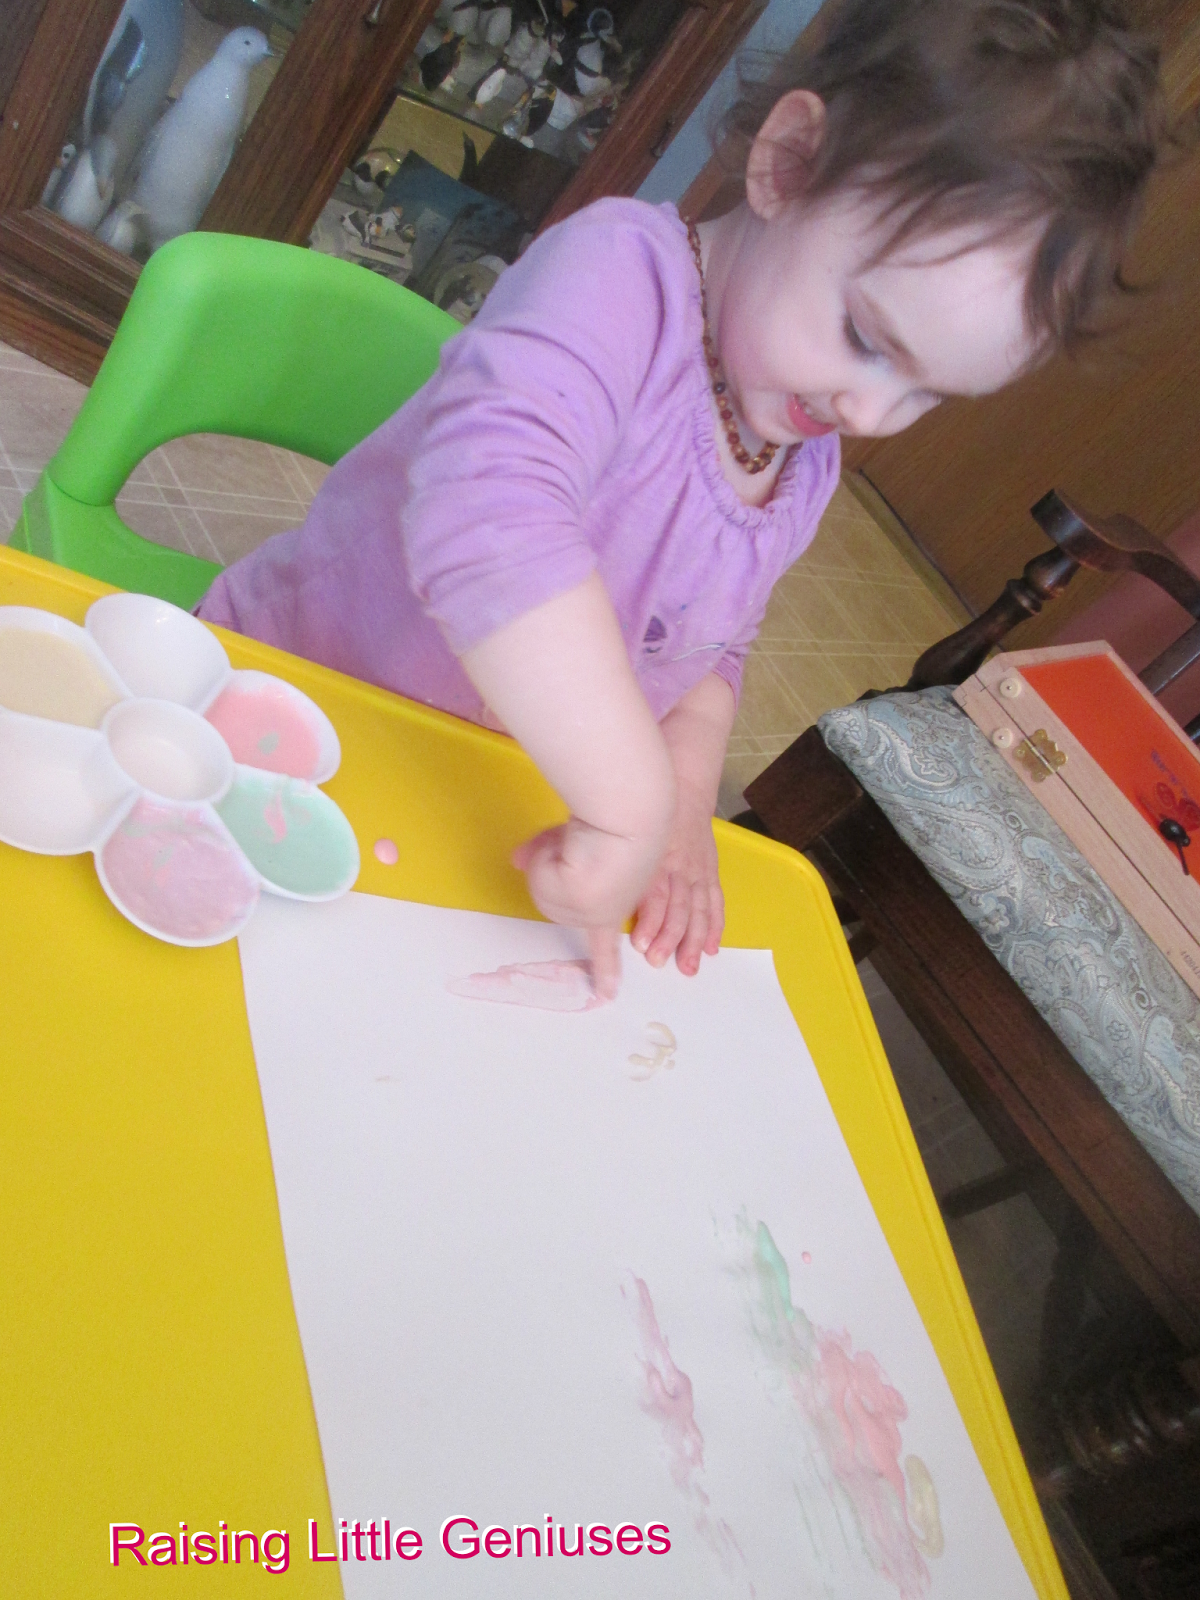
My daughter and I decided to great creative and make some Homemade Pastel Paints the other day to do some Easter crafts with! Making homemade paint is a great activity for kids to have fun in the kitchen. They can help with the measuring, pouring, and stirring! There may be a little mess involved if you let them just go at it, but at least it's not a recipe you'll be eating in case things go awry!

First, you'll need to get out all your ingredients. My daughter loves helping get everything we'll need and set it all out on the counter.
You'll need:
- All-purpose flour (I buy a huge bag from Target that I use only for sensory play/paints
- Neon purple food coloring
- Green food coloring
- Yellow food coloring
- Neon pink food coloring
- Water (you'll end up needing quite a bit more than a cup if you're making big batches like we did)
- Something to put the paint in (pictured is our paint palette, but we actually used 4 regular bowls to make the paint in, you'll see them further down)
- Spoons
- A fork

Note: If your bottles of food coloring don't have the squeeze one drop out at a time function like ours did, you might want to use a pipette or eye dropper to add the food coloring in to the paints so you don't add too much. You probably won't though cause quite a bit is still needed to get any color at all, but I know I'm guilty of pouring out way more than needed with the open/pouring style food coloring bottles.

So, depending on how thick you want your paint to be how much flour and how much water you use will vary. I didn't measure out what I was using, it's not an exact science. You can add some flour to each bowl first if you want, or just go one at a time. Use a fork to get the clumps out of the flour before you add the water, I forgot to do this the majority of the time and our paints ended up having some clumps in them. Then add water and mix the two together, adding more water or more flour to get the finger paint consistency that you're after. My daughter enjoyed the mixing!
Once you have that mixed pretty much all the way you can start to add the coloring. Obviously you only use one color per bowl. Start with a drop or two and add more as needed to get the right color. I seemed to need to add some more flour after this step to thicken it up more and help the colors look more pastel, but things might go differently for you depending on how much of what you already used.

When you've got all 4 paints made they should look something like this
You can see how some of ours were a bit clumpy, and how we had more of some colors than the others. I spooned some into my daughter's paint palette so she could get creating without having all 4 big bowls in front of her.
She got right to painting!

 Adorable!

Note: This paint either needs to all be used the day it is made, or stored in the refrigerator. It will get funky not since there is food ingredients used to make it.

Monday, March 24, 2014

Easter Sensory Bin

This bin is great for babies and young toddlers with supervision of course. It's a fun way for the kids to get in the spirit of Easter. You'll only need a few simple, inexpensive things that you probably already have at home. If not, you can easily find these things at the Dollar Tree, or stores such as Target and Walmart.

For the base material of the bin you'll want to use Easter grass. This comes in a multitude of colors, we used yellow and pink because it's what we had on hand. I like the way it turned out cheery and happy looking, just like Easter is!

I added some plastic eggs that had fun prints that I got from the Dollar Tree, some carrot-looking plastic eggs that we already had on hand, a wind up hopping bunny from Dollar Tree, and a plastic bunny head that plays music that we had on hand. Whatever things you have that are Easter themed that you want to add in, feel free.

Here's what ours looked like when presented to the kiddos: